
4WD Camping Guide for Beginners in Australia: Essential Tips
Meta description: 4WD Camping Guide for Beginners in Australia — essential tips, packing lists, safety checks, route picks, permits, step-by-step recovery and planning.

Introduction — who this 4WD Camping Guide for Beginners in Australia is for
If your biggest worry is getting bogged, breaking something expensive, or choosing a route that’s too hard, this 4WD Camping Guide for Beginners in Australia is built for you. You’re here because you want the safest, most legal, and most affordable way to start 4WD camping without learning the hard way on a remote track.
Two numbers matter straight away. Australia had more than million registered motor vehicles in recent national reporting, with utes and SUVs continuing to grow as a share of the fleet, according to the Bureau of Infrastructure and Transport Research Economics. Typical touring 4WDs such as a Toyota LandCruiser/79 Series or Ford Ranger often return a practical touring range of roughly 600–1,000km per tank, depending on load, tyres, terrain, and whether you’re driving in sand or towing.
This guide is for first-timers planning a realistic 1–7 day trip: beach camping on K’gari, a weekend in the Victorian High Country on easy tracks, a station stay in the Flinders Ranges, or a low-stress coastal run in WA. We researched current permit systems, entry-level gear, tyre pressure advice, and state park rules. Based on our analysis, most beginners do best when they start with short routes, carry more water than they think they need, and practise tyre deflation and compressor use before leaving home. We found that the difference between a smooth first trip and an expensive recovery usually comes down to planning, not bravado.
You’ll get the practical pieces that matter in 2026: a gear checklist, vehicle prep, route picks, permit guidance, navigation backups, recovery steps, communication options, insurance traps, budgets, and an FAQ you can actually use before booking your first trip.
4WD Camping Guide for Beginners in Australia — Vehicle prep & essential mods
The fastest way to ruin your first trip is to spend money on accessories before checking the basics. In our experience, a stock 4WD in good mechanical condition is safer than a heavily modified one with poor maintenance. Start with a service baseline and confirm fluids, brakes, battery health, cooling, tyres, and suspension before buying drawers, fridges, or lights.
Your pre-trip checks should include:
- Engine oil: level on the dipstick between low and full, checked on level ground when cool.
- Coolant: overflow bottle in range and no unexplained rise in operating temperature. Many modern 4WDs sit around 88–105°C in normal conditions depending on model and load.
- Brake pads and rotors: inspect for thickness, scoring, vibration, or pulling under braking.
- Battery: resting voltage around 12.6V when healthy; below 12.2V can indicate a weak state of charge.
- Tyres: tread, sidewall damage, age cracks, and matching load ratings.
Service intervals vary, but many touring diesels follow 10,000–15,000km oil and filter intervals under normal use. If you’re heading into dust, corrugations, water crossings, or towing, treat those intervals more conservatively. Motoring clubs such as RACV and RACQ regularly stress pre-trip inspections because heat, load, and tyre failure are common holiday breakdown triggers. For legal vehicle standards, check the Australian Government transport guidance and your state road authority.
Beginner-friendly modifications should solve a real problem. A dual-battery system with DC-DC charging usually costs AUD$800–$2,500 fitted. A basic 40–80L fridge can run from AUD$700–$2,000. Soft storage bags are often smarter than ARB-style drawer systems for beginners because they’re lighter and cheaper. Drawers typically cost AUD$1,500–$4,000+ fitted and can eat into payload quickly. DIY installs can save money, but poor wiring may affect warranty claims or create fire risk. We recommend licensed auto-electrical fitment for batteries, inverters, or permanent fridge circuits.
Payload matters more than most beginners realise. You need to understand tare, GVM (Gross Vehicle Mass), and GCM (Gross Combination Mass). Example: if a Ford Ranger has a GVM around 3,230kg and your vehicle weighs 2,650kg with passengers, fuel, and accessories before luggage, you only have about 580kg left. Add a canopy, fridge, water, recovery gear, passengers, and ball weight, and you can exceed limits fast. A LandCruiser wagon with a higher tare can run out of spare payload even sooner once barwork, roof racks, and long-range tanks are added. We found axle loads are where people get caught: if you place 80kg of tools and 60kg of water behind the rear axle, that load can disproportionately stress the rear axle rating. Use a public weighbridge and measure front axle, rear axle, and total vehicle mass separately.
Before every trip, do five quick tasks: tighten wheel nuts to spec and re-check after 50km if wheels were removed, inspect diff breathers, look at steering boots and CV gaiters for tears, check all lights, and confirm the spare tyre pressure. Those five minutes can save a ruined weekend.
Essential gear checklist for a beginner 4WD camper
A beginner kit should cover recovery, shelter, cooking, water, power, navigation, and small mechanical failures without turning your vehicle into a rolling hardware store. Based on our analysis, most first-timers overspend on storage and underspend on tyres, air management, and communications. Keep it simple, but don’t skip the genuinely critical items.
Vehicle recovery
- Snatch strap or kinetic rope: 8–10m, 9–12 tonne rating for common wagons and dual-cabs; examples include ARB, Ironman 4×4, Saber Offroad; AUD$80–$250.
- G-rated bow shackles or soft shackles: use only with rated points; AUD$20–$90 each.
- Recovery tracks: Maxtrax-style boards; AUD$150–$450.
- Winch basics: if fitted, use a rated blanket/dampener, gloves, and a snatch block; entry-level electric winches start around AUD$600, premium units can exceed AUD$2,000.
- Gloves, shovel, tyre deflator, compressor: budget AUD$150–$500 for the group.
Inspect straps, shackles, and tracks before every trip and after every heavy recovery. Replace any strap with cuts, melted fibres, or unknown history. Never attach a recovery strap to a tow ball.
Camping kit
- Swag or quality tent: Darche, Oztent, BlackWolf; AUD$250–$1,800.
- Sleeping bag and stretcher or mattress: AUD$150–$600.
- Awning optional, not essential: AUD$300–$1,500.
Kitchen, water, and power
- Single or dual-burner gas stove: Companion, Jetboil, Coleman; AUD$60–$300.
- Fridge 40–80L: Dometic, Engel, Evakool; AUD$700–$2,000.
- Dual battery: minimum 100Ah is a sensible starting point for fridge use.
- Water storage: 20–60L per person per week depending on climate and access to refills.
How did we calculate water? A realistic baseline for remote summer travel is 3–5L per person per day for drinking, plus cooking and minimal washing. For 2 people for days, a practical packing list is 40–60L potable water, a 50L fridge, gas canisters, battery box or dual-battery system, and collapsible bucket for washing up. In hot inland conditions, go higher.
Communications and tools
- UHF radio: Uniden or GME handheld/mobile; AUD$150–$600.
- Satellite communicator: Garmin inReach Mini 2; around AUD$500–$700 plus subscription.
- PLB: ACR or GME; AUD$300–$500, no ongoing subscription on many models.
- Tyre repair kit, pressure gauge, radiator hose clamp kit, spare fuses, engine belts where practical, and ideally 2 spare tyres for rougher areas.
Fuel needs care too. A 20L jerry can weighs roughly 15kg of fuel plus container weight, so two cans can add more than 35kg high up or behind the axle if stored badly. Keep fuel ventilated, upright, and outside the passenger cabin where possible.
4WD Camping Guide for Beginners in Australia: Trip planning — 7-step planning checklist (featured snippet)
If you want the shortest path from idea to booked trip, use this 7-step plan. We researched common beginner mistakes and found most problems show up before departure: wrong permit, no tyre compressor, too little water, or relying on mobile coverage that doesn’t exist.
- Choose the route and check access. Confirm seasonal closures, tides, and whether the track is 4WD-only. Use official sources such as Parks Australia and state park sites. Check average daily distance; beginners often enjoy 50–150km per day off-road far more than trying to cover 250km.
- Check vehicle capability. Confirm low range, tyre condition, spare tyre count, payload, and range. A soft-sand island route may require dropping to 14–18 psi; if you can’t air down and re-inflate, don’t go.
- Book permits and campsites. Many parks and beaches require advance booking, and some school-holiday periods fill weeks ahead. Save digital and printed copies.
- Prepare fuel and water plan. Calculate worst-case consumption, then add a reserve of at least 20%. Sand, corrugations, headwinds, and low-range work can increase fuel use dramatically.
- Pack the gear checklist. Put heavy items low and between axles. Check every recovery item is rated and every battery is charged.
- Share trip plan and communications. Tell one reliable person your route, campsite, ETA, check-in times, and escalation plan.
- Review weather and fire restrictions. Check BOM forecasts, tide charts, and state fire restrictions within hours of departure and again on the day.
Example: 5-day K’gari trip. Check vehicle and camping permits through Queensland’s booking system before travel, then estimate fuel using your normal highway figure plus a substantial sand margin. Many vehicles that use 11–13L/100km on-road can climb to 15–20L/100km or more in soft sand. A common starting tyre pressure is around 16–18 psi for loaded vehicles on beach and inland sand tracks, adjusted to conditions. Keep daily targets conservative, often 40–80km, because tide windows, bypasses, and traffic slow everything down.
Do I need a 4WD for camping in Australia? Not always. You only need one when the access track, sand, clearance, or park rules demand it. How to deflate tyres for sand? Stop on firm ground, use a deflator to drop all four tyres evenly to your target pressure, re-check with a gauge, and drive gently to avoid rolling a tyre off the rim.

Navigation, maps and offline planning
This is the section many competitor articles skip, and it’s where many remote trips go wrong. Mobile maps are useful, but one dead phone, one overheating device, or one missing offline download can leave you guessing at junctions with no signage. In 2026, a beginner 4WD setup should still have two independent navigation backups.
Your first backup should be a phone or tablet app with offline maps. Good options include Avenza Maps for geo-referenced PDF maps, Gaia GPS for route planning and tracking, and Hema Maps for Australian touring data. Your second backup should be a stand-alone GPS or dedicated tablet plus a printed topo map. That gives you digital redundancy and a no-battery fallback.
Use these file types correctly:
- GPX: best for routes, tracks, and waypoints.
- KML/KMZ: common for Google Earth-style route sharing.
- MBTiles: useful for offline tile sets in supported apps.
A simple workflow works well. Plan your route on a desktop map, export a GPX, import it into Gaia or Hema, then copy the same GPX to a microSD card or second device. Download your offline tiles before departure at suitable zoom levels and store the GPX in cloud storage while you still have reception. We recommend naming files clearly, for example: Kgari_Day1_CampA_to_EliCreek.gpx.
Map scale matters. Use 1:50,000 topo maps when you need creek lines, minor tracks, elevation detail, and navigation on complex terrain. Use 1:250,000 maps for broad route overview and road-stage planning. Hema products are widely used, but state government topo datasets can be excellent and cheaper or free depending on the jurisdiction.
Common mistakes are predictable: relying on live mobile coverage, forgetting to download tiles, using outdated GPX files, and driving onto tracks without permission. The fix is simple: carry a paper map and compass, download official track notes, and check access rights before you go. We tested this workflow on mixed reception routes and found the second digital backup matters almost as much as the paper one.
Safety, emergencies and communications
Your communications plan should follow a clear hierarchy: mobile first where coverage exists, UHF for convoy and nearby traffic, and satellite or PLB for genuine remote contingencies. Telstra generally has the broadest rural footprint, but coverage across remote Australia still drops away fast outside towns and highways. If you’re leaving sealed routes or heading onto islands, don’t assume you’ll have service at camp.
UHF radio is cheap, practical, and useful for convoy chatter, calling oncoming traffic on narrow tracks, and beach communication. Handhelds may run 5W, while vehicle units often deliver stronger practical performance with a mounted antenna. A Garmin inReach Mini 2 offers messaging, tracking, and SOS with multi-day to multi-week battery life depending on interval settings, but requires a subscription. A PLB has one job: life-threatening emergencies only. Many modern PLBs have battery replacement intervals around 7 years and no subscription fees, which makes them excellent backup devices.
Carry a compact trauma-focused first-aid kit, not just band-aids. Include compression bandages for snake bite immobilisation, sterile dressings, saline, blister care, burn gel, pain relief where appropriate, gloves, trauma shears, and a thermal blanket. Follow state ambulance or health guidance for first aid and emergency escalation, including advice from Healthdirect and state ambulance services.
If someone suffers suspected snake bite, keep them still, apply a pressure immobilisation bandage, splint the limb, and call for help. For heatstroke, move the person to shade, cool aggressively with water and airflow, and seek urgent medical help. Aeromedical evacuation should be considered when the patient has severe trauma, altered consciousness, chest pain, major dehydration not responding to fluids, or a limb-threatening injury with no reasonable road extraction.
Your emergency card should be simple:
- Stay with the vehicle if lost unless there is immediate danger.
- Conserve water and move to shade.
- Signal clearly with hazard lights, bright fabric, mirror, PLB, or satellite SOS if life-threatening.
- Report location using coordinates from your GPS or app.
- Do not attempt repeated self-recoveries if heat, tide, or terrain is worsening the risk.
Case studies from beach and desert incidents show the same pattern: bogged vehicles plus tide, dehydration, and poor communications escalate fast. Based on our research, delays of several hours for local assistance and much longer in remote regions are common enough that self-sufficiency for water, shade, and communications is non-negotiable.
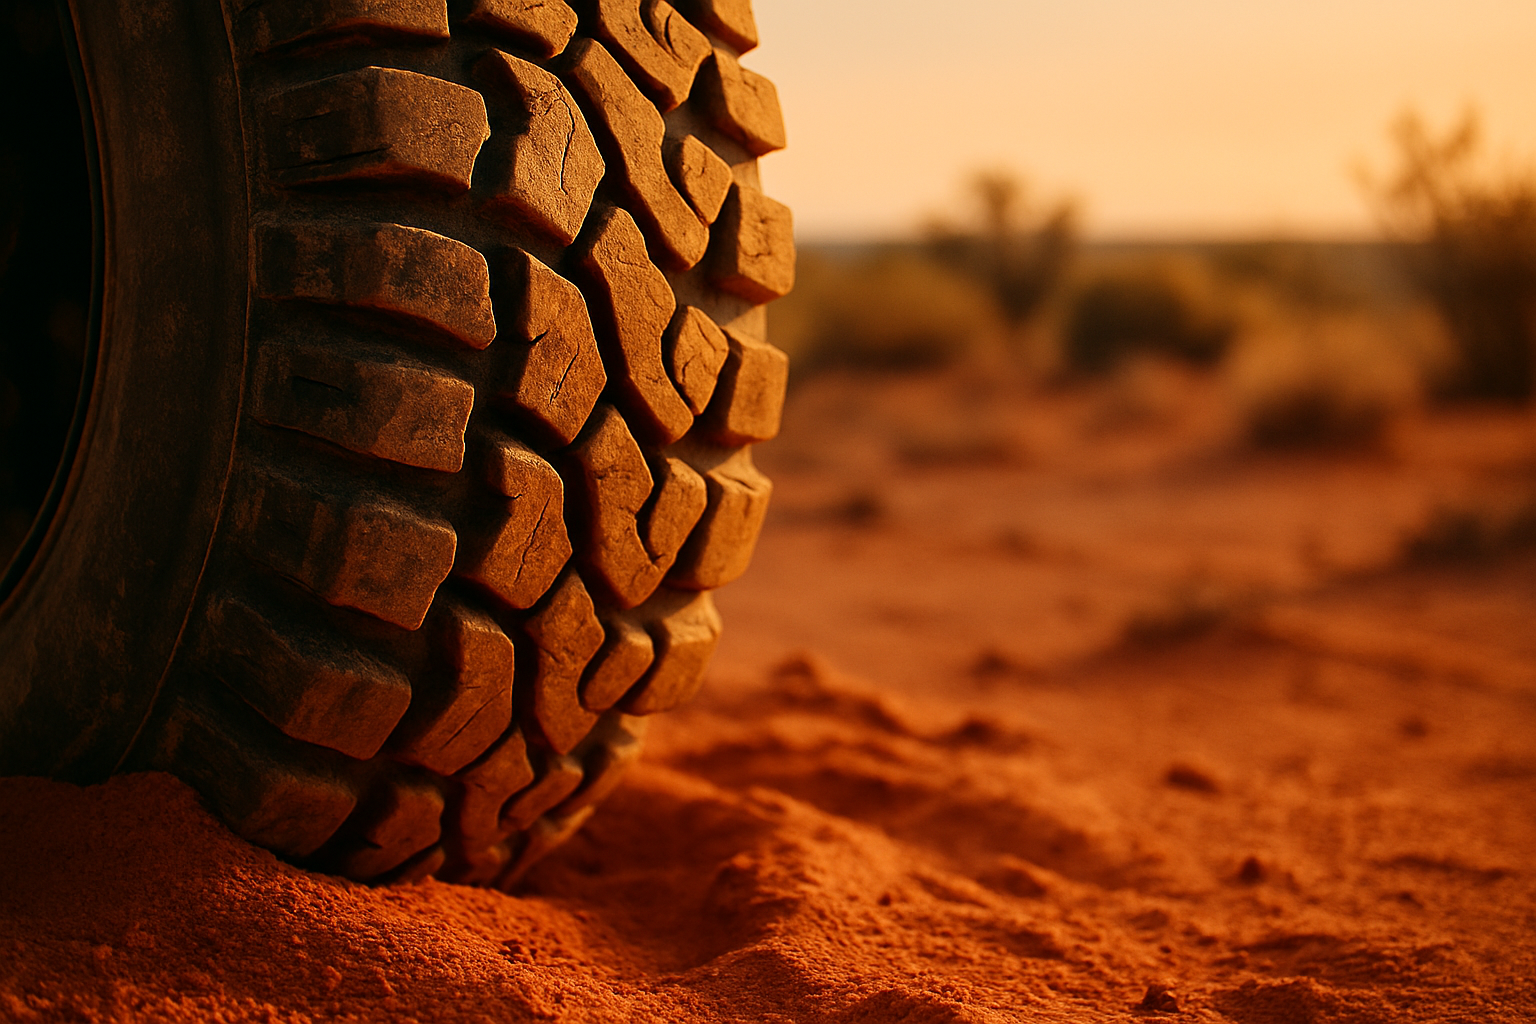
Tyre pressures, traction and recovery skills
Tyre pressure is the beginner skill that pays off fastest. Correct pressures improve traction, reduce wheelspin, lower the chance of digging in, and can dramatically change whether you float over sand or bury the diffs. A solid starting range for many 4WDs is 14–18 psi on soft sand, 25–30 psi on gravel, and 30–40 psi on sealed roads, but vehicle weight, tyre construction, and speed all matter.
Here’s a practical way to choose a starting point. If your normal road pressure is psi in a loaded wagon, dropping to around 16–18 psi for beach sand is often reasonable. If you’re in a lighter dual-cab on all-terrains and the sand is firm, 18 psi may be enough. On rocky gravel roads, don’t just slash pressure without thinking about speed; lower pressure helps ride and puncture resistance, but high speed with low pressure builds heat and can damage tyres.
Tyre type also matters. All-terrain tyres such as BFGoodrich All-Terrain KO2-style patterns are usually a better beginner choice for mixed touring because they balance road noise, chip resistance, and sand performance. Mud-terrain tyres offer stronger bite in mud and deeper voids, but can be noisier, heavier, and not always better in soft beach driving. Running very soft pressures on sand can also raise fuel consumption, especially if you’re carrying extra load.
Use this quick recovery checklist:
- Assess the situation and hazards. Check tide, slope, spectators, and whether the vehicle is bellied out.
- Put on gloves and prepare gear. Clear sand or mud from recovery points and tyres.
- Position recovery points correctly. Use only rated points and straight-line pulls where possible.
- Use a rated snatch strap or winch with dampener. Keep people well clear.
- Re-check the vehicle and track. Look for damage, clear ruts, and re-inflate tyres when back on firm ground.
Recovery tracks should go under the leading edge of the tyres in the intended direction of travel, not tossed randomly behind a spinning wheel. Compressors vary, but many portable 12V units need several minutes per tyre to go from 16 psi back to psi, especially on larger LT tyres. If the pull angle becomes severe, visibility is poor, or the vehicle is in rising surf or unstable ground, stop and call professional recovery.
Permits, land access and legal rules (Indigenous and park permits)
Permits are where many first trips come unstuck, because access rules change by state, park, season, and land tenure. You may need camping permits, vehicle access permits, Aboriginal land permits, fishing licences, and private station permissions on the same trip. Never assume that a visible track equals legal access.
National park camping fees and vehicle permits vary widely. Island access, beach permits, and peak-season camping can cost significantly more than inland bush camps. For state-specific fire and camping rules, check sites such as NSW National Parks and Parks Victoria. For broader environmental rules, use Australian Government environment.
Aboriginal land access often requires a separate application process. For example, Arnhem Land permits are typically managed online through the relevant permit authority, with conditions about roads, photography, camping zones, and alcohol. In Cape York and some WA regions, access may also involve local councils, traditional owner organisations, or station managers. Private station stays in the Flinders Ranges or outback SA may require booking and property-specific driving rules.
A simple process works best:
- Identify who manages the land: national park, Aboriginal land trust, council, station, or private property.
- Check if transit, camping, fishing, or beach driving each require separate approval.
- Apply early and save copies offline.
- Read the conditions carefully, especially road closures, sacred site exclusions, and fire restrictions.
Campfire rules can change overnight. During total fire bans, open fires are often prohibited even in places where fire pits are normally allowed. When bans are active, switch to a gas stove, carry enough fuel, and don’t improvise with driftwood or cut timber. Towing rules matter too: speed limits, brake requirements, lighting, ball weight, and load distribution differ by rig and state. Penalties for overloaded vehicles or unsafe towing can run into the hundreds or thousands of dollars, so always check current state road rules before departure.
Beginner-friendly routes and sample itineraries (with budgets)
The best first trip is not the most famous one. It’s the one that gives you manageable daily distances, reliable camps, and enough margin to fix mistakes. We recommend these 8 beginner-friendly routes:
- North Stradbroke Island: easy-moderate, best in cooler dry months, permit rules apply, shorter beach stages.
- Moreton Island: easy-moderate sand, ideal for tyre pressure practice, ferry planning required.
- K’gari (Fraser Island): moderate for true beginners, better with preparation and tide planning.
- Flinders Ranges station roads: easy, dry season and shoulder season are ideal.
- Cape Range/Ningaloo: easy-moderate coastal touring, best outside extreme summer heat.
- Victorian High Country easy tracks: seasonal, avoid winter closures and wet conditions.
- Gawler Ranges area: suitable on easier access roads with planning.
- Kimberley novice-access sections with a guide: dry season only, guided is best.
Not recommended for true beginners: Simpson Desert and more remote Central Australia desert crossings. Why? Long fuel gaps, multiple recoveries, heavy tyre and suspension demands, heat exposure, and a much smaller margin for error. A guided trip or staged experience is the smarter first step.
Sample itinerary 1: 2–5 days. Moreton or Stradbroke. Drive day one, set camp, beach fish or short track loop day two, recovery practice and return day three. Budget roughly AUD$500–$1,200 for people including ferry, permits, fuel, camps, and food.
Sample itinerary 2: 7–10 days. Flinders Ranges station loop. Short daily distances, station campsites, scenic gorges, and easy skills progression. Budget about AUD$1,200–$2,400 for depending on fuel and accommodation mix.
Sample itinerary 3: 10–14 days. Ningaloo/Cape Range with sealed-road support and easy coastal tracks. Mix campgrounds with one paid cabin stop to recharge and resupply. Budget AUD$2,000–$4,000+ depending on distance from home state.
Real-world 5-day K’gari example: secure permits before travel, arrive with tyre pressures around 16–18 psi, plan around tide windows for eastern beach sections, keep daily distance modest, and watch for washouts, inland bypass traffic, and soft entries off the beach. Daily targets of 40–80km are realistic for beginners when sightseeing, fishing, and tide timing are part of the trip.
Environmental & cultural responsibilities
Good 4WD camping in Australia isn’t just about where you can drive. It’s also about where you shouldn’t drive, what you leave behind, and how you behave on Country. Many of Australia’s most sought-after routes cross or border Indigenous land, culturally sensitive sites, or fragile ecosystems that recover slowly from careless driving.
Start with permission and protocol. If you’re visiting Indigenous land, confirm whether general transit is allowed, whether camping is restricted to designated areas, and whether photography, drone use, fishing, or collecting natural materials is prohibited. Uluṟu is the clearest example of why local rules matter: access conditions are shaped by cultural authority, not just tourism demand. We recommend choosing operators and experiences that work directly with Traditional Owners where possible, because that usually gives you better local context and more accurate access guidance.
Leave No Trace needs to be practical, not just symbolic. Use toilets where provided. Where permitted and where no toilet exists, follow local distance rules from watercourses and camps, use a trowel, and pack out toilet paper if required. Greywater should be strained and disposed of according to park rules, not dumped beside camp. Fuel and chemical spills are preventable: store liquids upright, use funnels, keep absorbent material handy, and never refuel next to waterways.
Campfires are heavily regulated in many parks. Gas stoves are often the safer default, especially in when seasonal restrictions and extreme fire weather continue to affect large parts of Australia. Illegal firewood collection and unauthorised campfires can attract hefty fines, and those fines are far cheaper than the consequences of a bushfire. For binding environmental rules, check Australian Government environment and your state park authority before every trip.
Insurance, hiring and budgeting for beginners
If you’re not ready to buy, hiring can be a smart way to learn what you actually need. But rental contracts for 4WDs can be full of exclusions that matter the moment you hit sand, creek crossings, or rough station roads. On pickup, inspect the vehicle slowly and photograph every panel, wheel, underbody visible area, windscreen, roof edge, and interior with timestamped images. That one habit can save you from expensive disputes later.
Check these hire and insurance items before signing:
- Underbody damage: often excluded or carries a high excess.
- Water damage: commonly excluded, especially from creek crossings or saltwater exposure.
- Beach and sand driving: sometimes prohibited unless specifically approved.
- Recovery and winching: many policies exclude bogging costs or only cover accident recovery, not poor driving decisions.
Roadside assistance from organisations such as NRMA, RACQ, and RACV can be useful, but remote extraction limits still apply. Read the distance and accessibility conditions carefully.
For a typical 7-day beginner trip, a realistic budget template looks like this:
- Low budget: fuel AUD$350, permits/camps AUD$150, food AUD$200, gear amortisation AUD$100 = AUD$800.
- Medium budget: fuel AUD$600, permits/camps AUD$300, food AUD$300, gear amortisation AUD$300 = AUD$1,500.
- High budget: fuel AUD$1,000+, permits/camps AUD$500, food AUD$450, gear amortisation AUD$700+ = AUD$2,650+.
You can cut costs through off-season travel, sharing fuel with friends, borrowing gear, and using motoring club discounts. Just don’t cut the wrong things. Skipping a satellite communicator on a remote route, carrying one spare instead of two on sharp gravel, or running overloaded to save a second vehicle is a false economy. Based on our analysis, the cheapest safe trip is usually a shorter, better-planned one.
Conclusion — actionable next steps for your first 4WD camping trip
Your first trip should be boring in the best possible way: no mechanical surprises, no permit drama, no late-night navigation guesswork, and no heroic recoveries. The aim of this 4WD Camping Guide for Beginners in Australia is to help you build a repeatable system you can trust, whether you’re doing a 2-night island run or a 7-day touring loop.
Take these 5 actions this week:
- Download one route GPX and one offline map to your phone and a backup device.
- Book permits and campsites and save copies offline.
- Inventory your gear against the checklist and buy only the missing essentials.
- Arrange communications by carrying a PLB or inReach, or at minimum sharing a detailed trip plan.
- Run a pre-trip vehicle check and tyre-pressure test so you know your compressor, deflator, and gauge all work.
Before committing to remote travel, practise on beginner-friendly weekends such as North Stradbroke, Moreton Island, or easy station-country routes in the Flinders Ranges. Your practice run checklist should include tyre deflation, compressor use, one full camp setup, one recovery-track drill, UHF radio check, and offline map navigation.
We researched the most common beginner mistakes and the pattern is clear: people go too far, too soon, with too much weight and too little preparation. Based on our analysis, you’ll learn faster and safer by joining organised groups, local 4WD clubs, or accredited training courses if you’re unsure. Bookmark Parks Australia, BOM, and your state emergency or rescue service pages now. Then build your first route around your skills, not your social media feed. That’s how good trips keep happening.
Frequently Asked Questions
Do I need a 4WD to go camping in Australia?
No. You only need a 4WD when your campsite or route includes soft sand, deep ruts, low-range climbs, beach access, or unsealed tracks that specifically require it. Many national park campgrounds are accessible by 2WD, but for beaches like K’gari and some Cape Range tracks, a true 4WD with correct tyre pressures is essential.
What recovery gear is essential for beginners?
For beginners, the core recovery kit is a rated snatch strap or tow strap, G-rated shackles or soft shackles, recovery tracks, gloves, a tyre deflator, a compressor, and at least one rated recovery point front and rear. We recommend adding a tyre repair kit and a long-handled shovel before your first beach trip.
How much water should I carry per person?
Carry 20–60 litres of potable water per person per week, depending on heat, remoteness, and whether you have any refill points. For a 5-day trip, people should usually pack at least 40–60 litres total, and more if daytime temperatures are above 30°C.
Can I drive on beaches and what permits are needed?
Yes, you can drive on some Australian beaches, but many require vehicle access permits, camping permits, and compliance with tide and speed rules. K’gari, Moreton Island, and some South Australian coastal parks all have permit systems, so always confirm with the relevant park authority before departure.
How do I safely use a snatch strap?
Only use a snatch strap between rated recovery points, never tow balls or unrated tie-down points. Lay the strap out straight, keep bystanders well clear, use a dampener if available, and communicate clearly between drivers before any pull.
What is the easiest 4WD route in Australia for beginners?
A strong shortlist is 1) North Stradbroke Island for easier sand access, 2) selected Moreton Island routes, 3) Flinders Ranges station roads, and 4) Cape Range coastal tracks in the dry season. The best season depends on the route, but autumn to early spring is usually the safest starting window for most beginners.
Key Takeaways
- Start with vehicle condition, payload checks, and tyre management before spending money on accessories.
- Use a 7-step planning system: route, capability, permits, fuel and water, gear, communications, and weather/fire checks.
- Carry two navigation backups, enough water for heat and delays, and communications that match the remoteness of your route.
- Choose beginner-friendly routes such as Moreton, Stradbroke, Flinders Ranges, or easier Cape Range tracks before attempting harder desert travel.
- Respect permits, Indigenous land access rules, fire restrictions, and environmental responsibilities on every trip.